
Advanced Pinball Lamp Controller
Chroma-Color Display for America's Most Haunted Installation
NOTE: Pinball Mayhem has filmed an installation video, available here. Thanks, guys.
1. Turn off power to the game and wait 10 minutes.
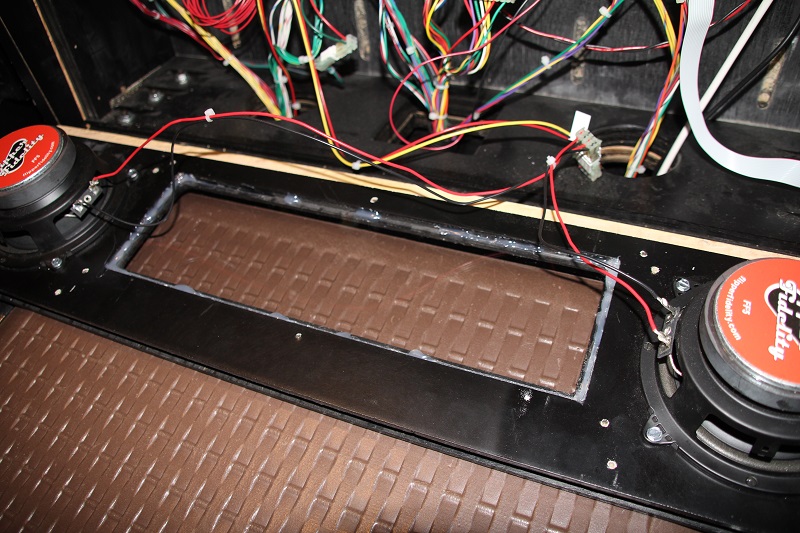
2. Remove the backglass from the game and lower the speaker panel. A blanket or pad on the glass is a good idea to prevent damage to the game.
3. Disconnect the ribbon cable (data) and IDC cable (power) from the stock display.
4. Remove the screws holding the stock display in place.
5. Remove the stock display and put it in a safe place in case you want your game to be green again later.
6. The stock DMD cover is tinted green, and you will need to replace it. Mine was glued in place, and I was able to remove it by pushing it through the back of the speaker panel.
7. If there is glue remaining in the groove, scrape it out as necessary to let the clear replacement cover fit.
8. Peel the film off both sides of the clear replacement cover.
9. Place the clear replacement cover in the speaker panel groove and fasten it appropriately. I used a generous amount of hot glue. If you want it to be more durable, you may need to use other glue or screws.
10. Temporarily place the new display in place so that you can mark the mounting hole locations. This is a very important step so that the image aligns with the speaker panel hole properly. The bottom edge of the display should align with the wood/black plastic border about a half inch from the bottom edge of the speaker panel. The top hole in the mounting bracket should align with the top edge of the speaker panel. The display bracket should also be centered between the two speakers.
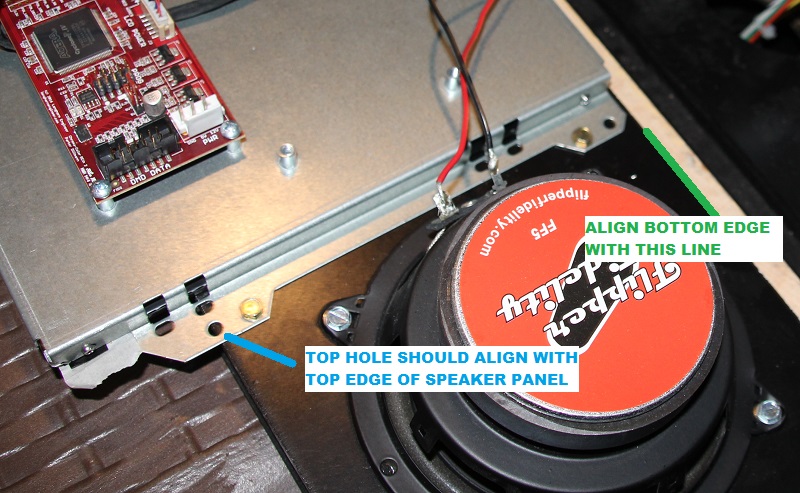
11. Mark the locations for the mounting holes using a pencil. The second and third mounting holes on each side of the bracket should be used.
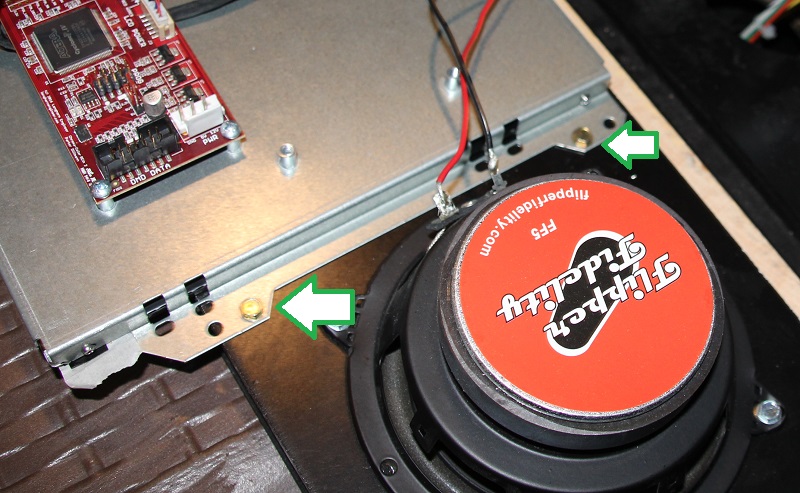
12. Remove the display and drill pilot holes at the marked locations. You DO NOT want to drill to far or you will have holes through the front of your speaker panel. You only need to go about 1/32" or enough to pierce the melamine (black plastic). Using a masking tape guide wrapped around the drill bit can also make it easier to judge.
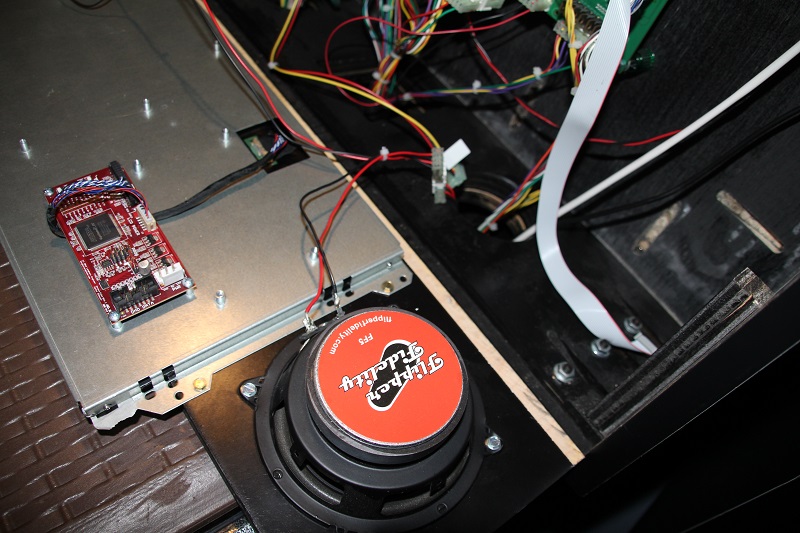
13. Remove the plastic film from the front of the display.
14. Place the display back onto the speaker panel and use the provided screws to attach it.
15. Disconnect the stock power cable from the "BOARD POWER" connector on the upper left of the game board.
16. The supplied power cable has two connectors on one end and one connector on the other end. Connect one of the connectors from the two connector end to the "BOARD POWER" connector on the board.
17. Insert the supplied Z-connector into the second connector on the power cable.
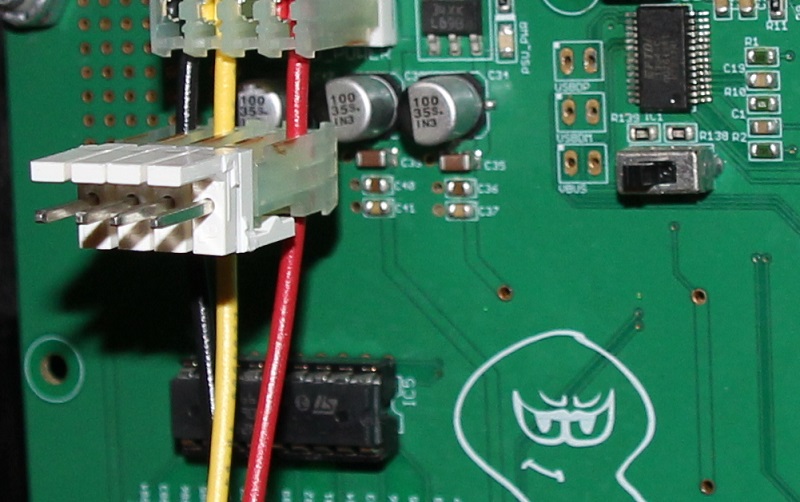
18. Connect the game's power cable to the Z-connector. This the the cable you disconnected in step 3.
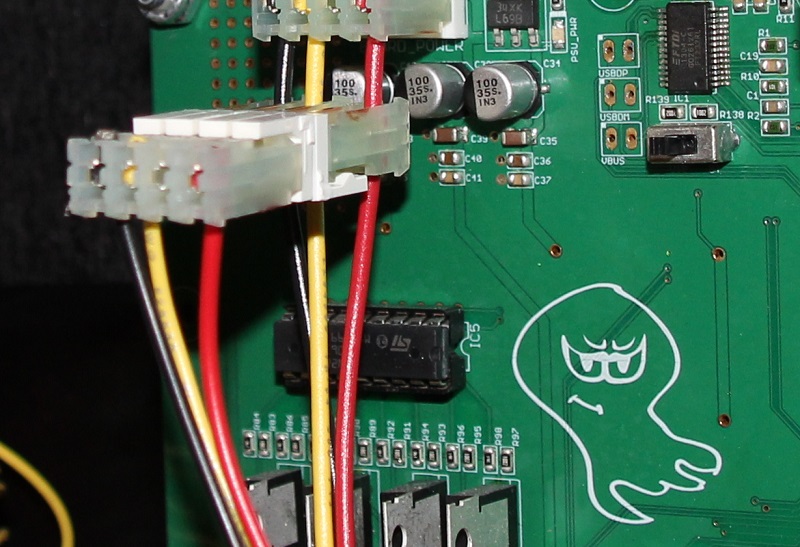
19. Connect the other end of the power cable to the PWR connector on the display's Chroma-Color board.

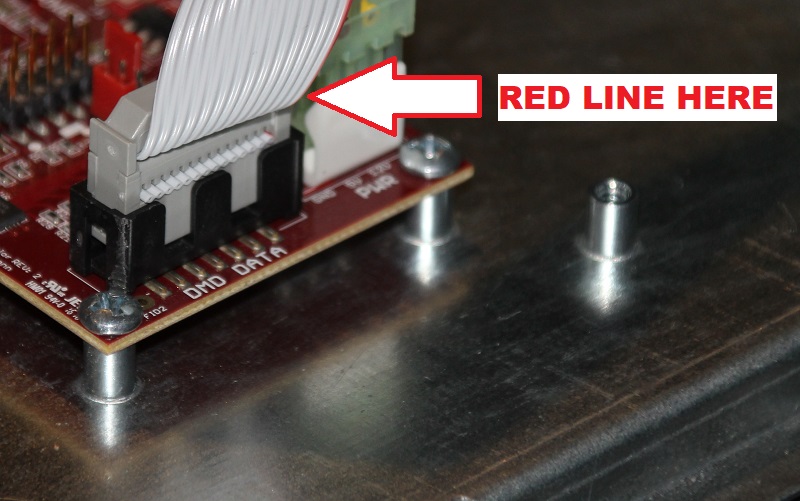
20. Ensure that the red line on the ribbon cable is oriented properly on the game board end.
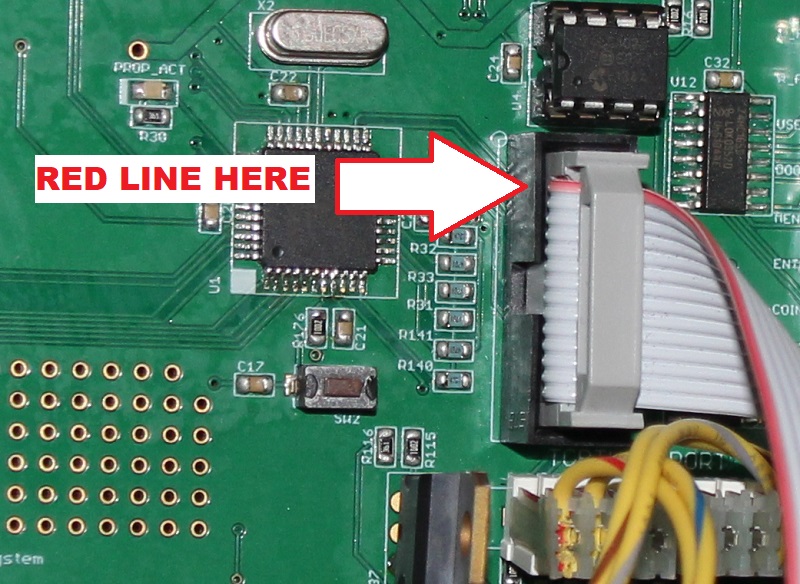
21. Connect the other end of the ribbon cable to the DMD DATA connector on the display's Chroma-Color board. Ensure that the red line is oriented properly.
22. Raise the speaker panel to its normal position.
AV Firmware Update
This is basically the same process you may have used to update the AV firmware previously using an official Spooky release. The biggest difference is that the color display will not display the progress bar (or anything else) since the existing firwmare is not able to drive it properly.
1. Replace the stock SD card with the provided one. You will always need to use the new SD card since the old one is too slow to properly handle the extra reads necessary for color video.
2. Turn on power to the game and wait for the update to finish. As mentioned above, you will not be able to see the progress bar, so you will need to wait for the software version text to be displayed. It only takes about 1 minute. If this does happen to fail, please contact me for help.
3. Turn off power to the game and wait a few seconds.
4. Turn on power to the game and enjoy.
As we continue to color additional videos, we will post updates at the link below.